前言
vue-elmentui-admin,它是一个很好的后台基础模板,但是这个项目的大佬早就开始停更了,那么对于后面我们想要在使用toast-ui-Markdown编辑器的时候,需要增加一些新的功能,如UML图等,我们该如何升级。下面是我的升级方法
package.json
  "dependencies": {
    "@achrinza/node-ipc": "^10.1.10",
    "@toast-ui/editor": "^3.2.2",
    "@toast-ui/editor-plugin-chart": "^3.0.1",
    "@toast-ui/editor-plugin-uml": "^3.0.1",
    "axios": "0.18.1",
    "clipboard": "2.0.4",
    "codemirror": "5.45.0",
    "core-js": "3.6.5",
    "driver.js": "0.9.5",
    "dropzone": "5.5.1",
    "echarts": "4.2.1",
    "element-ui": "2.13.2",
    "file-saver": "2.0.1",
    "fuse.js": "3.4.4",
    "js-cookie": "^2.2.0",
    "jsonlint": "1.6.3",
    "jszip": "3.2.1",
    "local-storage": "^2.0.0",
    "moment": "^2.29.4",
    "normalize.css": "7.0.0",
    "nprogress": "0.2.0",
    "path-to-regexp": "2.4.0",
    "screenfull": "4.2.0",
    "script-loader": "0.7.2",
    "sortablejs": "1.8.4",
    "vue": "2.6.10",
    "vue-count-to": "1.0.13",
    "vue-recaptcha": "^1.3.0",
    "vue-router": "3.0.2",
    "vue-splitpane": "1.0.4",
    "vuedraggable": "2.20.0",
    "vuex": "3.1.0",
    "xlsx": "0.14.1"
  },
请先确定对应的包模块是否是最新或者对应等级。
修改代码
vue-element-admin-master/src/components/MarkdownEditor
在这个目录中存在着对应markdown的组件代码,我们需要进行修改,下面我将我的代码直接cv出来,想要2.0升级到3.0,可以直接cv
vue-element-admin-master/src/components/MarkdownEditor/default-options.js
// doc: https://nhnent.github.io/tui.editor/api/latest/ToastUIEditor.html#ToastUIEditor
export default {
  minHeight: '200px',
  previewStyle: 'vertical',
  useCommandShortcut: true,
  useDefaultHTMLSanitizer: true,
  usageStatistics: false,
  hideModeSwitch: false,
  toolbarItems: [
    ['heading', 'bold', 'italic', 'strike'], ['hr', 'quote'], ['ul', 'ol', 'task', 'indent', 'outdent'], ['table', 'image', 'link'], ['code', 'codeblock']]
}
2.0 to 3.0 toolbarItems变成了一个二维数组了
vue-element-admin-master/src/components/MarkdownEditor/index.vue
<template>
  <div :id="id" />
</template>

<script>
import 'codemirror/lib/codemirror.css' // codemirror
import '@toast-ui/editor/dist/toastui-editor.css'

import Editor from '@toast-ui/editor'
import defaultOptions from './default-options'
import { uploadImg } from '@/api/admin/upload'

import uml from '@toast-ui/editor-plugin-uml'
import chart from '@toast-ui/editor-plugin-chart'

export default {
  name: 'MarkdownEditor',
  props: {
    value: {
      type: String,
      default: ''
    },
    id: {
      type: String,
      required: false,
      default() {
        return 'markdown-editor-' + +new Date() + ((Math.random() * 1000).toFixed(0) + '')
      }
    },
    options: {
      type: Object,
      default() {
        return defaultOptions
      }
    },
    mode: {
      type: String,
      default: 'markdown'
    },
    height: {
      type: String,
      required: false,
      default: '75vh'
    },
    language: {
      type: String,
      required: false,
      default: 'en_US' // https://github.com/nhnent/tui.editor/tree/master/src/js/langs
    }
  },
  data() {
    return {
      editor: null
    }
  },
  computed: {
    editorOptions() {
      const options = Object.assign({}, defaultOptions, this.options)
      options.initialEditType = this.mode
      options.height = this.height
      options.language = this.language
      return options
    }
  },
  watch: {
    value(newValue, preValue) {
      if (newValue !== preValue && newValue !== this.editor.getMarkdown()) {
        this.editor.setMarkdown(newValue)
      }
    },
    language(val) {
      this.destroyEditor()
      this.initEditor()
    },
    height(newValue) {
      this.editor.height(newValue)
    },
    mode(newValue) {
      this.editor.changeMode(newValue)
    }
  },
  mounted() {
    this.initEditor()
  },
  destroyed() {
    this.destroyEditor()
  },
  methods: {
    initEditor() {
      this.editor = new Editor({
        el: document.getElementById(this.id),
        plugins: [uml, chart],
        ...this.editorOptions
      })
      if (this.value) {
        this.editor.setMarkdown(this.value)
      }
      this.editor.on('change', () => {
        this.$emit('input', this.editor.getMarkdown())
      })
      this.uploadImg()
    },
    destroyEditor() {
      if (!this.editor) return
      this.editor.off('change')
      this.editor.destroy()
    },
    setValue(value) {
      this.editor.setMarkdown(value)
    },
    getValue() {
      return this.editor.getMarkdown()
    },
    setHtml(value) {
      this.editor.setHtml(value)
    },
    getHtml() {
      return this.editor.getHTML()
    },
    uploadImg() { // 这个函数可以不加,我是为了后台cv图片的时候可以自动上传到阿里云对象存储重写的方法。
      this.editor.removeHook('addImageBlobHook')
      this.editor.on('addImageBlobHook', (_file, cb) => {
        const file = new FormData()
        file.append('file', _file)
        const result = uploadImg(file)
        result.then(({ code, msg, url }) => {
          if (code === 20000) {
            this.$message.success(msg)
            cb(url, file.name)
          }
        })
      })
    }
  }
}
</script>
升级后样式
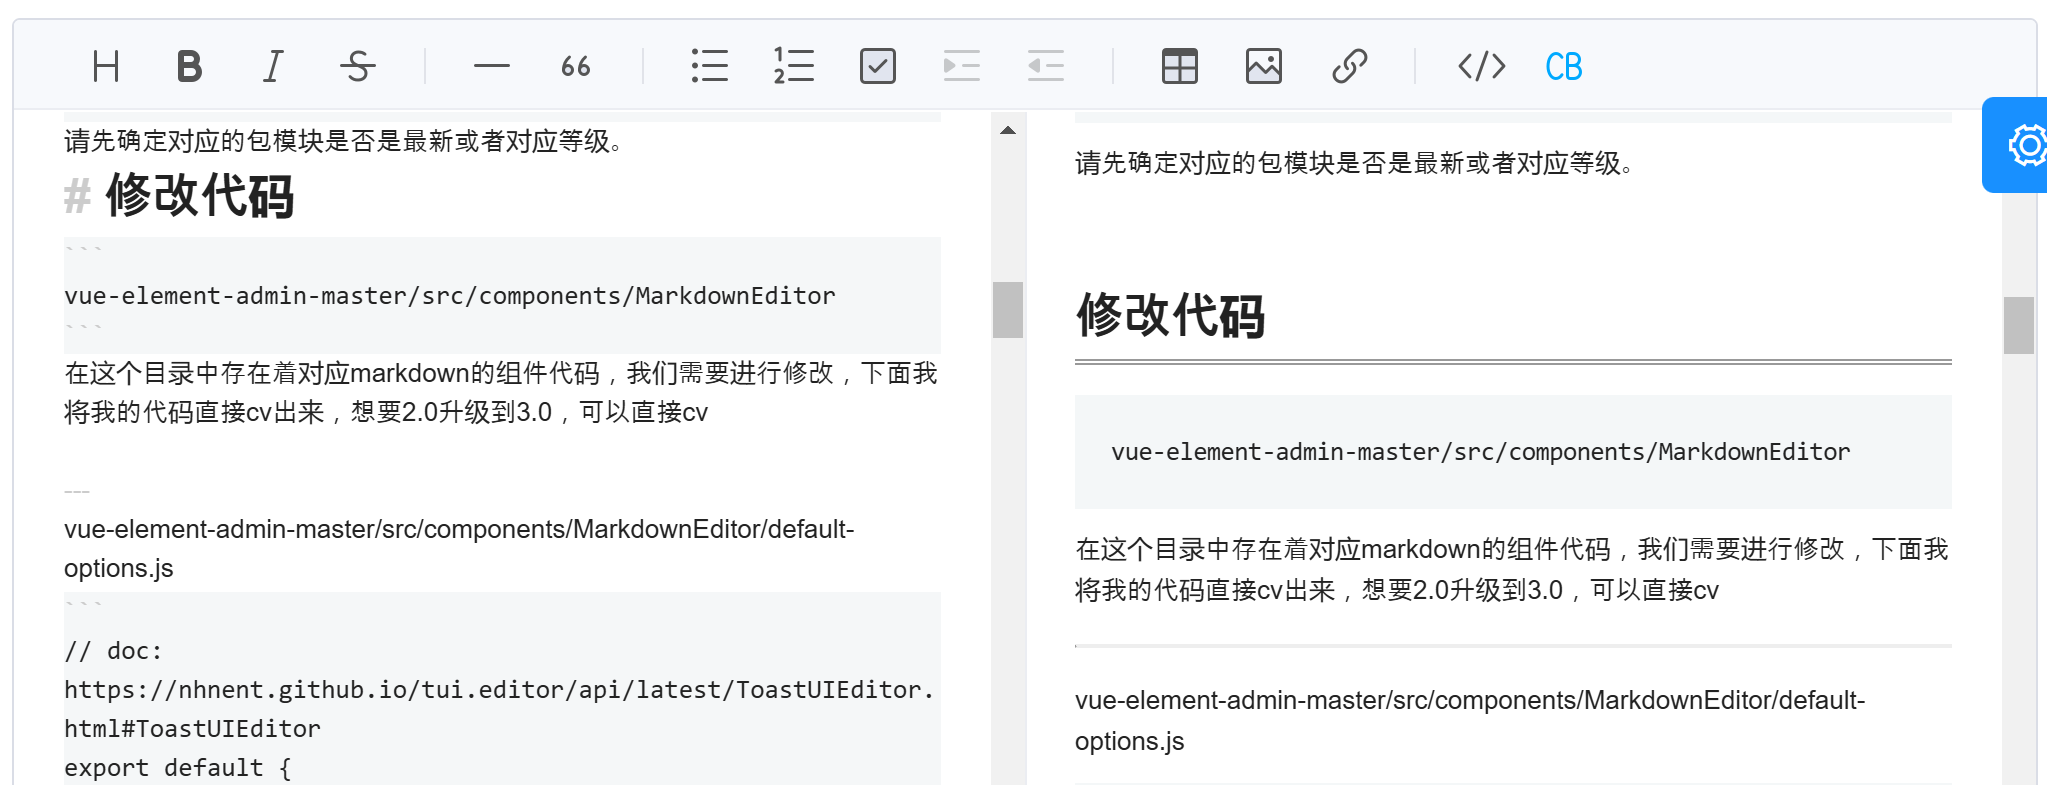 工具栏看起来都高级了很多
添加插件
import uml from '@toast-ui/editor-plugin-uml'
import chart from '@toast-ui/editor-plugin-chart'
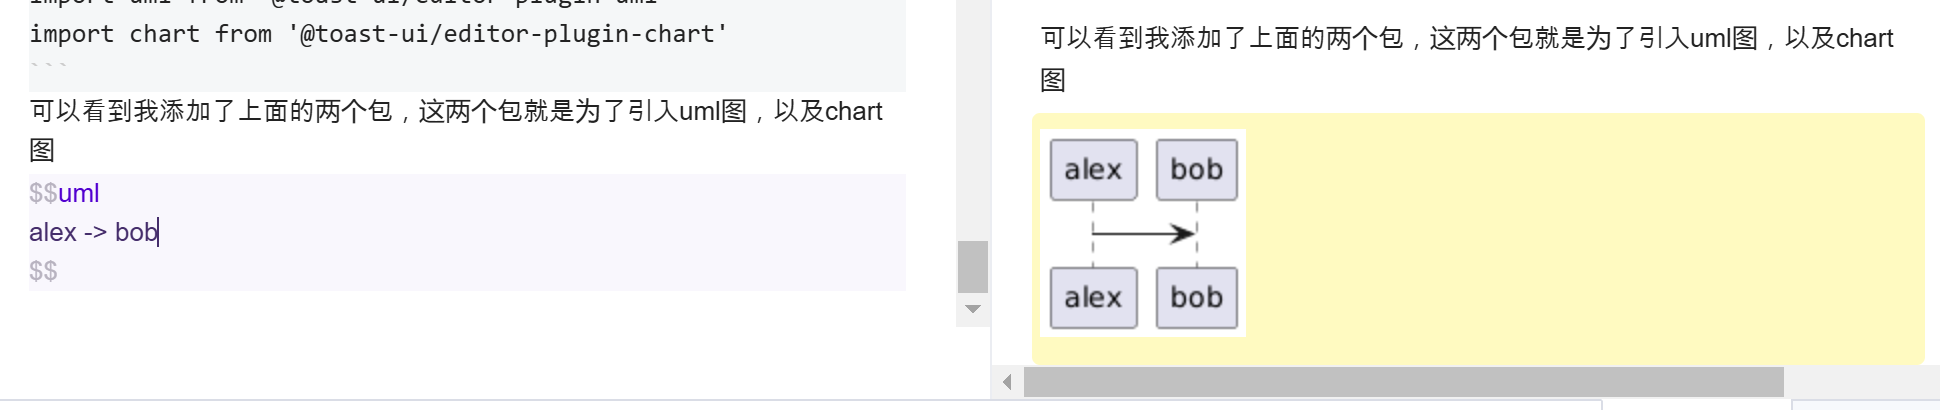
可以看到我添加了上面的两个包,这两个包就是为了引入uml图,以及chart图
$$uml
alex -> bob
$$
这样就可以直接在markdown中去画图了
注意事项
这个toast-ui 有一个views查看器的插件,比较适配这个后端,但是如果你的markdown和前端渲染的包不是同一个项目中的,会遇到对于前端html符号的转义问题,这个就需要慢慢解决了,如取消转义等。
前端如何渲染UML图
//计算UML hex编码
const stringToHex = str => [...str].map(char => char.charCodeAt(0).toString(16)).join('');

// 正则表达式匹配 PlantUML 代码块
  renderedContent = renderedContent.replace(/\$\$uml\s*(.*?)\$\$/gs, (match, umlCode) => {
    // 对 UML 代码进行 Hex 编码
    const hexUml = stringToHex(umlCode);

    // 创建 PlantUML 图表 URL
    const plantUmlUrl = `https://www.plantuml.com/plantuml/png/~h${hexUml}`;

    // 返回图像标签
    return `<img src="${plantUmlUrl}" alt="PlantUML 图表" style="display: block; margin: 0 auto;">`;
  });
前端渲染可以直接使用plantuml.com提供的服务,我们只需要将我们的图编码后发送到服务器后即可,后端会返回一个png的url链接。
评论区